 Save to Pinterest
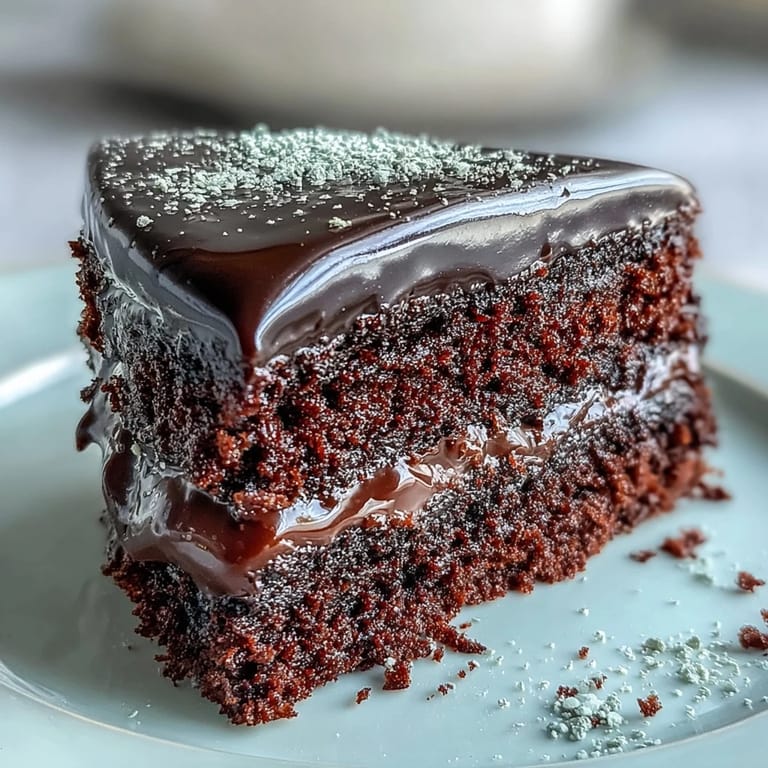
 My kitchen smelled like a chocolatier's workshop the afternoon I pulled this cake from the oven for the first time. I'd been skeptical about whether something this rich could also be this simple, but watching that glossy batter slide into the tins, I knew I was onto something good. The texture turned out impossibly squidgy, the kind that makes forks irrelevant and fingers tempting. It's become my go-to whenever I need something that looks impressive but doesn't require pastry school credentials. One bite and you'll understand why I keep the recipe taped inside my cupboard door.
I made this for my neighbor's birthday last spring, and she insisted I'd ordered it from a bakery. The way the icing caught the afternoon light made it look almost too pretty to cut, but we did anyway, and the interior was still warm enough to make the chocolate sing. Everyone went quiet for a few seconds after the first bite, which is always the best compliment. I've since made it for christenings, book club meetings, and one particularly stressful Tuesday when nothing else would fix the day. It's the kind of cake that turns occasions into memories.
Ingredients
- Unsalted butter (200 g for cake, 100 g for icing): Use good quality butter for richness, and make sure it's truly unsalted so you control the sweetness and salt balance.
- Dark chocolate (200 g for cake, 150 g for icing, minimum 50% cocoa solids): This is where the depth comes from, so choose chocolate you'd actually enjoy eating on its own.
- Light brown sugar (250 g): The molasses notes add warmth and keep the crumb soft and tender, unlike white sugar which can make cakes drier.
- Large eggs (3): Room temperature eggs whisk up lighter and blend more smoothly into the batter.
- Plain flour (200 g): All-purpose flour works perfectly here, providing just enough structure without making the cake heavy.
- Baking powder (1 ½ tsp): Fresh baking powder is essential for a good rise, so check the date on your tin before you start.
- Fine sea salt (¼ tsp): A pinch of salt sharpens the chocolate flavor and balances the sweetness beautifully.
- Cocoa powder (50 g): Sift it well to avoid lumps, and use unsweetened cocoa for the best control over flavor.
- Whole milk (150 ml for cake, 3 tbsp for icing): Full-fat milk makes the batter silky and the icing glossy, so don't swap it for skim.
- Vanilla extract (1 tsp): Pure vanilla deepens the chocolate notes in a way that feels almost invisible but absolutely necessary.
- Icing sugar (200 g, sifted): Sifting prevents gritty icing, and it only takes a minute but makes all the difference.
Tired of Takeout? 🥡
Get 10 meals you can make faster than delivery arrives. Seriously.
One email. No spam. Unsubscribe anytime.
Instructions
- Prep your tins and preheat:
- Set your oven to 180°C (160°C fan) and grease two 20 cm round tins generously, then line the bottoms with baking paper. This step prevents heartbreak later when the cakes stick.
- Melt the chocolate and butter:
- Place the chopped chocolate and butter in a heatproof bowl over a pan of gently simmering water, stirring now and then until smooth and glossy. Let it cool for a few minutes so it doesn't scramble the eggs.
- Whisk the eggs and sugar:
- In a large bowl, whisk the sugar and eggs together until the mixture is pale, thick, and leaves a ribbon trail when you lift the whisk. This usually takes about three to four minutes with an electric whisk.
- Combine the chocolate mixture:
- Stir the cooled melted chocolate into the egg mixture, followed by the vanilla extract. The batter will look glossy and smell incredible at this point.
- Sift and fold the dry ingredients:
- Sift the flour, baking powder, salt, and cocoa powder into a separate bowl, then gently fold it into the wet mixture, alternating with the milk, until just combined. Don't overmix or the cake will turn tough.
- Divide and bake:
- Split the batter evenly between your prepared tins and smooth the tops with a spatula. Bake for 30 to 35 minutes, until a skewer inserted in the center comes out with just a few moist crumbs clinging to it.
- Cool completely:
- Let the cakes rest in their tins for 10 minutes, then turn them out onto a wire rack to cool fully. Trying to ice a warm cake will result in a melted mess, trust me.
- Make the icing:
- Melt the chocolate and butter together as before, then remove from heat and gradually beat in the sifted icing sugar and milk until smooth and spreadable. The icing should be glossy and thick enough to hold its shape.
- Assemble and ice:
- Place one cake layer on your serving plate, spread about a third of the icing on top, then add the second layer and cover the top and sides with the remaining icing. Use a palette knife to smooth it out, or embrace a rustic swirled finish.
 Save to Pinterest
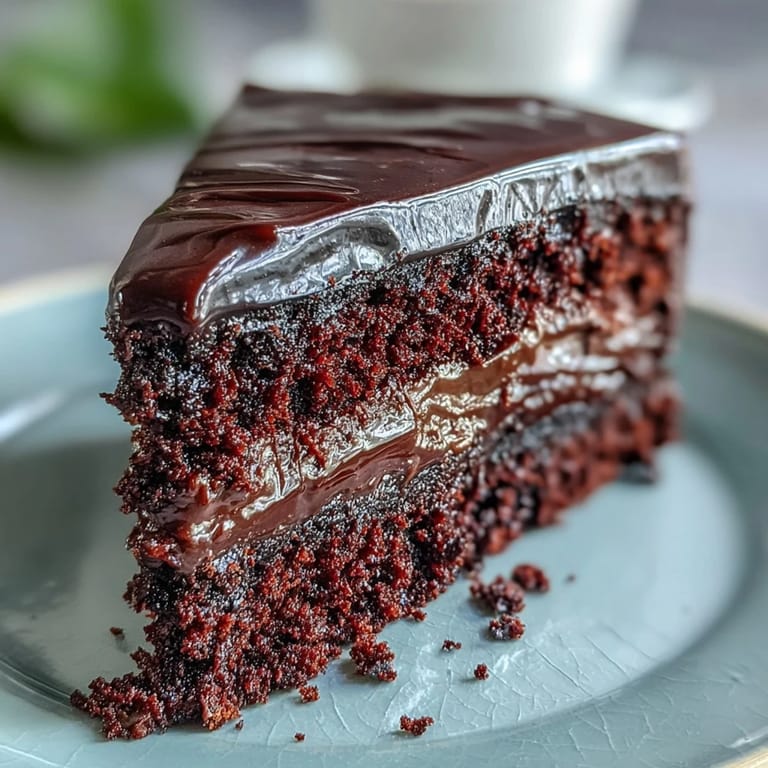
 The first time I served this at a dinner party, someone asked if I'd trained in Paris. I laughed and admitted I'd barely followed the recipe without second-guessing myself, but the cake had done all the work. There's something about a homemade chocolate cake that feels like an act of love, even when it's just you and a quiet Saturday. It's the kind of dessert that makes people linger at the table, scraping their plates and asking for seconds. I've stopped apologizing for how rich it is because nobody ever actually complains.
Storing and Keeping
This cake keeps beautifully in an airtight container at room temperature for up to three days, staying moist and fudgy the entire time. If your kitchen is particularly warm, you can refrigerate it, but let it come back to room temperature before serving so the icing softens and the flavors bloom. I've even frozen individual slices wrapped tightly in cling film, which makes for an excellent emergency dessert when unexpected guests arrive. The texture holds up remarkably well, and no one will guess it wasn't baked that morning.
Serving Suggestions
I love serving this with a dollop of lightly whipped cream to cut through the richness, or a handful of fresh raspberries for a tart contrast. A scoop of vanilla ice cream on the side turns it into a proper indulgent pudding, especially if the cake is still barely warm. For a grown-up twist, a drizzle of raspberry or cherry liqueur over each slice adds a subtle boozy depth that makes it feel extra special. However you serve it, keep the portions generous because this is not the time for restraint.
Variations and Extras
If you want to gild the lily, spread a thin layer of raspberry or apricot jam between the cake layers before icing for a fruity surprise. I've also stirred a tablespoon of espresso powder into the melted chocolate for a deeper, more complex flavor that adults particularly love. For a special occasion, top the finished cake with fresh berries, edible flowers, or even a scattering of chocolate shavings.
- Add a teaspoon of orange zest to the batter for a subtle citrus note that pairs beautifully with dark chocolate.
- Swap the milk in the icing for double cream if you want an even richer, more luxurious finish.
- Dust the top with a light sprinkle of sea salt flakes just before serving for a trendy salted chocolate effect.
 Save to Pinterest
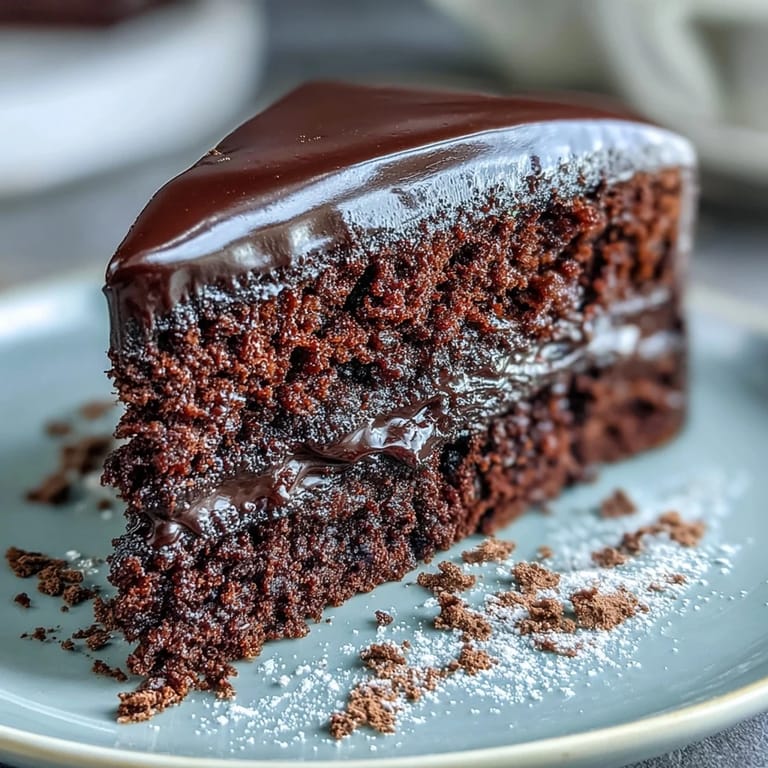
 This cake has never let me down, and I hope it becomes as reliable a friend in your kitchen as it has in mine. Bake it with confidence, share it generously, and don't be surprised when people start requesting it by name.
Recipe FAQs
- → Can I use milk chocolate instead of dark chocolate?
Yes, but dark chocolate with at least 50% cocoa solids gives the best flavor depth and prevents the cake from being overly sweet. Milk chocolate will result in a sweeter, less intense chocolate taste.
- → Why is my cake dry instead of squidgy?
Overbaking is the most common cause. Check the cake at 30 minutes—it should have a few moist crumbs on the skewer, not come out completely clean. Also ensure you measure ingredients accurately and don't overmix the batter.
- → Can I make this cake in advance?
Absolutely. The cake layers can be baked up to 2 days ahead and stored wrapped in cling film. Ice on the day of serving for best results, or store the finished cake in an airtight container for up to 3 days.
- → How do I get a smooth icing finish?
Ensure your icing is at the right consistency—not too thick or runny. Use a warm palette knife dipped in hot water and dried to smooth the surface. Work quickly while the icing is still spreadable.
- → Can I freeze this chocolate cake?
Yes, the unfrosted cake layers freeze beautifully for up to 3 months. Wrap them tightly in cling film and foil. Thaw completely at room temperature before icing and serving.
- → What can I serve with this cake?
Fresh berries like raspberries or strawberries provide a lovely contrast to the rich chocolate. Whipped cream, crème fraîche, or vanilla ice cream also work wonderfully alongside each slice.