 Save to Pinterest
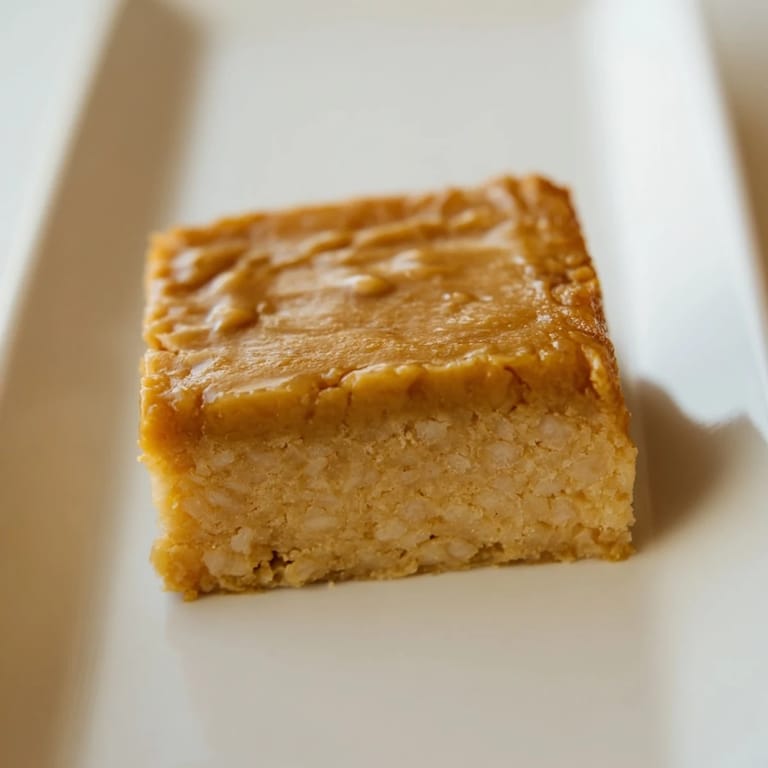
 I discovered peanut butter mochi cake entirely by accident when my neighbor brought one to a potluck, and I couldn't stop eating it. The texture hit me first—that impossible combination of chewy and tender, like someone had transformed cake into something that actually jiggled on the fork. She revealed it was a family recipe blending her Japanese heritage with her American love of peanut butter, and I was immediately hooked. I begged for the recipe that night, and now it's become my go-to dessert whenever I want something that feels both comforting and just a little bit exotic.
I made this cake for the first time on a random Tuesday afternoon when I had all the ingredients sitting in my pantry and felt restless. My hands were a little shaky whisking the wet ingredients—I was nervous about the coconut milk curdling or the eggs not mixing smoothly—but the moment that golden batter hit the pan, I knew I'd gotten it right. The whole kitchen smelled like nutty peanut butter and warm coconut, and when I pulled it out of the oven and saw that perfect golden top, I called my neighbor immediately to say thank you.
Ingredients
- Sweet rice flour (mochiko): This is non-negotiable and creates that signature chewy texture you're after; regular rice flour won't give you the same sticky, tender crumb.
- Granulated sugar: Sweetens the batter and helps activate the baking powder for that subtle lift.
- Baking powder: Just enough to give the cake structure without making it rise too much and lose that mochi density.
- Salt: Balances the sweetness and makes the peanut butter flavor pop.
- Whole milk and coconut milk: Together they create richness and moisture; the coconut milk especially keeps this cake tender days after baking.
- Eggs: Bind everything together and add richness without being too heavy.
- Creamy peanut butter: Use the kind that's just peanuts and salt, not the extra-sweet varieties, so the peanut flavor stays honest.
- Melted butter: Adds flavor and helps distribute richness throughout the batter.
- Vanilla extract: A small amount rounds out the flavors without making it taste like vanilla cake.
Tired of Takeout? 🥡
Get 10 meals you can make faster than delivery arrives. Seriously.
One email. No spam. Unsubscribe anytime.
Instructions
- Prep your oven and pan:
- Heat to 350°F while you gather everything, and line or grease that 9x13-inch pan thoroughly so nothing sticks. This is the moment to decide if you're going for parchment or butter—both work, but parchment gives you the easiest cleanup.
- Combine your dry ingredients:
- Whisk the sweet rice flour, sugar, baking powder, and salt together in a large bowl until everything is evenly distributed and there are no pockets of flour hiding in the corners. This step actually matters because it distributes the baking powder evenly.
- Mix the wet ingredients:
- In a separate bowl, whisk together the milk, coconut milk, eggs, peanut butter, melted butter, and vanilla until you get a smooth, almost cream-colored mixture. Don't overthink it—just make sure the peanut butter is fully incorporated and there are no streaks.
- Bring it together:
- Pour the wet mixture into the dry ingredients and whisk gently until you have a smooth, lump-free batter that falls off the whisk in ribbons. If you see flour pockets, keep whisking, but don't go crazy or you'll develop too much gluten and toughen the cake.
- Settle the batter:
- Pour into the prepared pan and give it a gentle tap on the counter a few times to release air bubbles that might create large holes later. You want tiny, even bubbles, not big pockets.
- Bake until golden:
- Slide into the oven for 45 to 50 minutes until the top is a deep golden brown and a toothpick comes out clean when you poke the center. The edges might pull away slightly from the pan when it's done.
- Cool before serving:
- Let the whole pan sit on the counter until it's completely cool—this is crucial because the mochi cake sets as it cools and gets that beautiful chewy texture. Cutting into it while warm will give you crumbly mess.
 Save to Pinterest
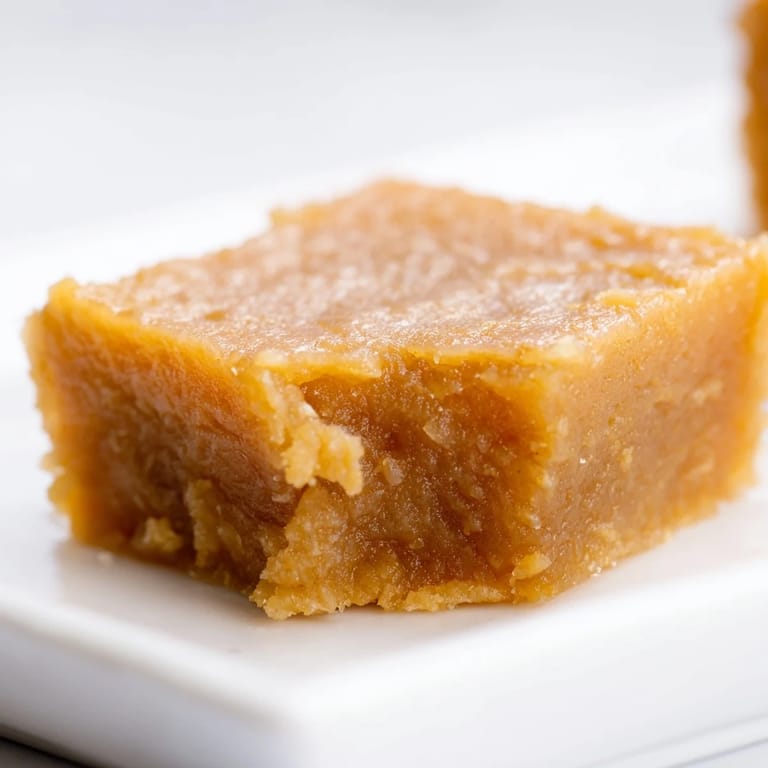
 The first time someone told me this cake reminded them of something their grandmother made, I realized this wasn't just a dessert—it was a bridge between two food cultures that somehow made perfect sense together. That moment shifted how I think about this recipe, from a cool novelty into something genuinely meaningful.
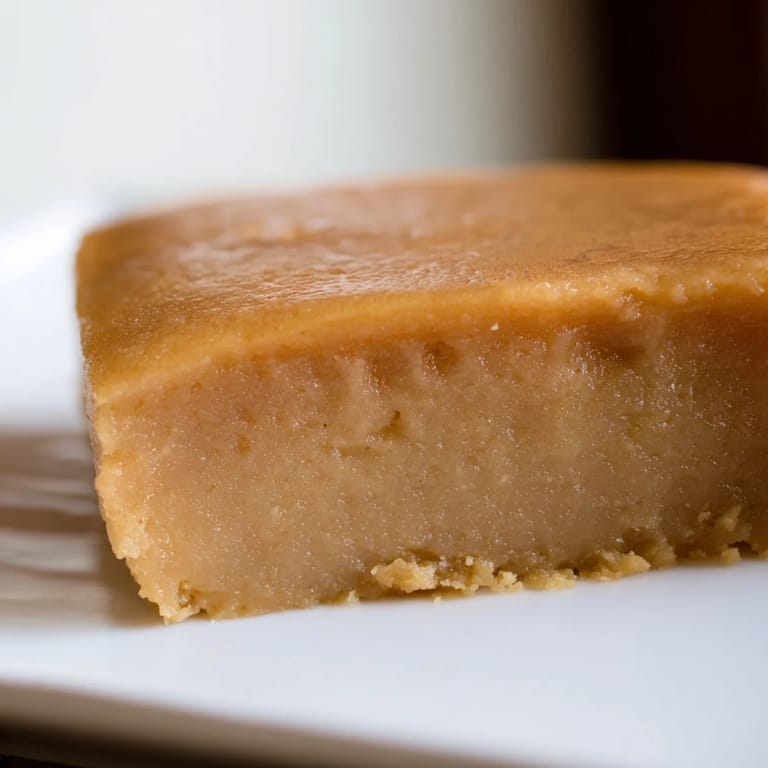
Why This Cake Stays Chewy
Mochiko—sweet rice flour—contains almost no gluten, which is what makes the cake tender and chewy instead of fluffy and crumbly like a traditional cake. The coconut milk adds fat and moisture that keeps the crumb soft and almost fudgy. When you cool it completely, the starches in the rice flour actually set the texture further, making the cake more moist and chewy the next day than it was fresh from the oven.
Making It Your Own
This recipe is forgiving and actually welcomes tweaks once you understand how it works. You can swap the coconut milk for evaporated milk if you want a lighter coconut flavor, or add a tablespoon of peanut butter powder for extra nuttiness without making the batter too wet. Some people sprinkle roasted peanuts on top before baking for a textural contrast, which I've done and loved.
Serving and Storage Wisdom
Serve this cake at room temperature or chilled—it's genuinely good either way, though I prefer it slightly chilled because the chewy texture becomes even more pronounced. Leftovers keep beautifully in an airtight container in the fridge for four or five days, and honestly, it tastes better on day two.
- Whipped cream or fresh berries make perfect partners, especially if you want to cut through the richness.
- It travels well for potlucks and picnics because it's sturdy enough to cut into neat squares without falling apart.
- If you're feeding people with nut allergies, mark this one clearly since peanuts are front and center.
 Save to Pinterest
 This peanut butter mochi cake has become my answer whenever someone asks what dessert I'm bringing, and I love watching people experience that surprised moment of discovering a texture they didn't know they needed. It's proof that the best recipes are born from mixing cultures and traditions with a little fearlessness.
Recipe FAQs
- → What flour is used for mochi cake?
Sweet rice flour, also known as glutinous rice flour or mochiko, gives mochi cake its signature chewy texture.
- → Can I substitute the coconut milk?
Yes, evaporated milk can be used instead of coconut milk to create a lighter flavor while maintaining moisture.
- → How to get a crunchy topping?
Sprinkling roasted peanuts on top before baking adds a delightful nutty crunch to the cake.
- → Is this suitable for gluten-free diets?
Yes, using sweet rice flour and checking ingredient labels ensures this cake is gluten-free.
- → What is the best way to serve the cake?
It’s enjoyable served at room temperature or chilled, and pairs well with whipped cream or fresh fruit.