 Save to Pinterest
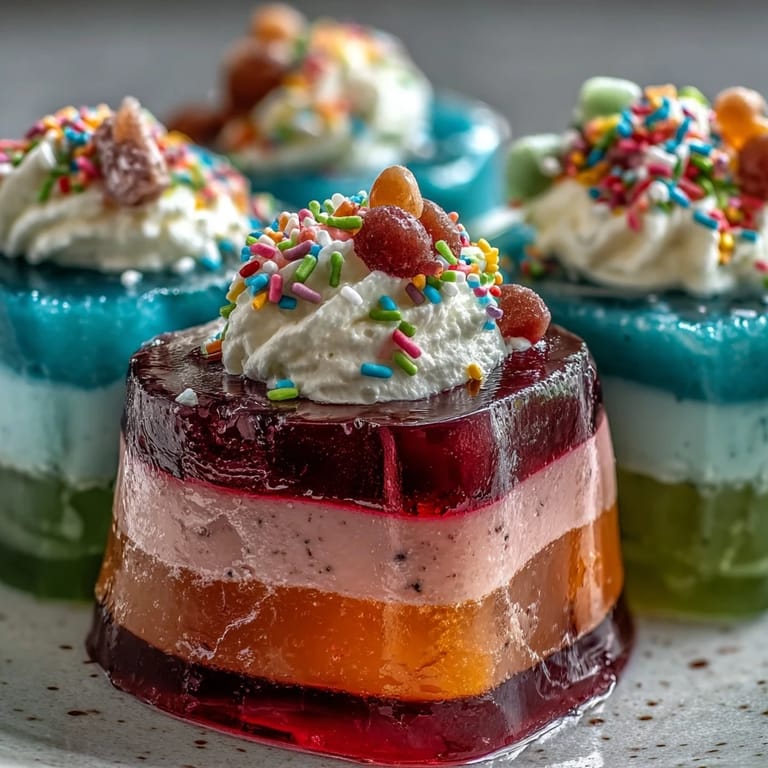
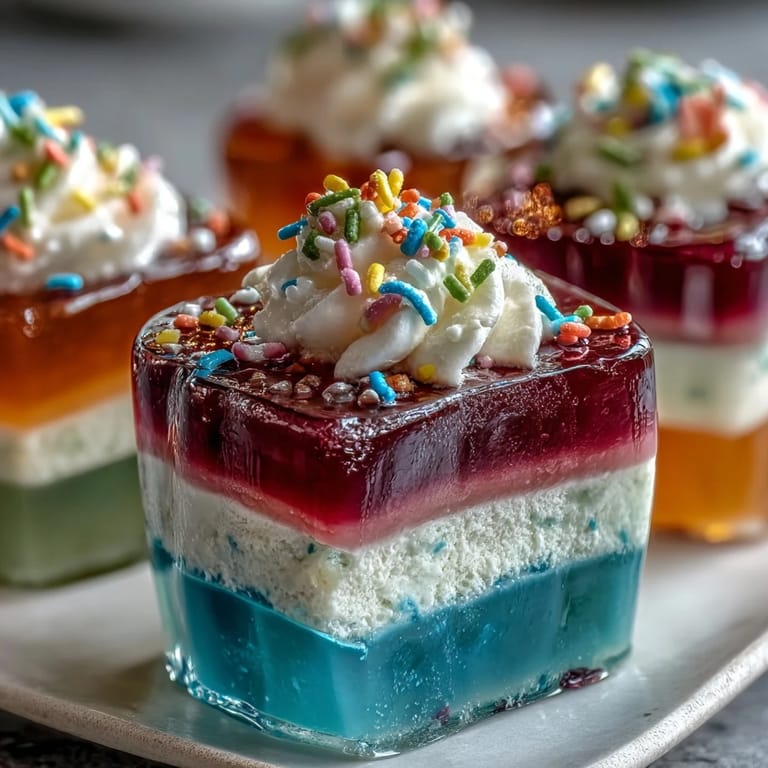
 The first time I made Rainbow Jello Cups, the kitchen felt like a splash of color after a rainy day. I was caught up in the playful spirit of layering different hues, and the way each packet of Jello released a little cloud of fruity aroma reminded me to relax and laugh at the process. My timer beeped endlessly, but I found joy in peeking into the refrigerator every half hour, watching the jiggly layers take shape. It’s one of those desserts that feels more like crafting than cooking, especially when you’re surrounded by eager little helpers. There’s something magical about seeing a row of cups glow in the fridge, promising pure delight.
I remember making these for my niece’s birthday: the kitchen buzzed with excitement, everyone sneaking glimpses into the fridge between games. One layer went in uneven, but nobody minded—her friends thought it made their cups extra special, and we joked it was our "abstract art." Even the grown-ups gathered around to admire the vibrant stacks before devouring them, whipped cream mustaches included. The spectacle of serving these chilled rainbow cups transformed a simple gathering into a moment of joyful chaos. These cups became the centerpiece, with little hands waving for seconds.
Ingredients
- Strawberry Jello: The red layer is bright and sweet—dissolve it fully to avoid lumps, and it gives a lively start to the rainbow.
- Orange Jello: A cheerful hue with citrus notes, try letting it cool a bit before pouring so layers don’t bleed.
- Lemon Jello: Adds a sunny yellow and tangy touch—make sure it's set firmly before pouring the next tier.
- Lime Jello: The green is vibrant and refreshing; stir patiently to help the color shine.
- Berry Blue Jello: This deep blue always attracts the kids; pour slowly for bold bands.
- Grape Jello: For a rich purple base, blend thoroughly and chill until completely set.
- Boiling water: Each flavor needs a hot bath; hotter water means quicker dissolving.
- Cold water: Kept precisely measured, helps each color set the right amount and texture.
- Whipped cream or topping: A billowy flourish—chill it first for neat peaks and easy piping.
- Rainbow sprinkles: Optional but irresistible, they turn dessert into instant celebration.
Tired of Takeout? 🥡
Get 10 meals you can make faster than delivery arrives. Seriously.
One email. No spam. Unsubscribe anytime.
Instructions
- Start with the Purple Layer:
- Dissolve the grape Jello in boiling water—steam rising and aroma filling the air—then stir in cold water and pour a thin layer into each cup. Chill the cups for 30–40 minutes and practice patience; peek only if you can’t resist.
- Add the Blue Layer:
- Mix berry blue Jello the same way, then gently layer it over the purple, trying not to jiggle the cups. Slide them back into the fridge, letting anticipation build with each set.
- Layer the Green:
- Prepare lime Jello and pour carefully, watching the green glow as it settles, another round of chilling begins.
- Add the Yellow Sunshine:
- Lemon Jello mixed and cooled slightly before pouring, its brightness lifts the stack—wait again, maybe play a game while it sets.
- Pour the Orange:
- Orange Jello joins the rainbow, a gentle hand keeps bands neat; set aside time for the final chill.
- Finish with Red:
- Strawberry Jello crowns the rainbow—pouring slowly to avoid mixing, then all cups chill for the last layer to set.
- Top and Serve:
- Flourish each cup with whipped cream, sprinkles if desired, and serve chilled—watch faces light up with every spoonful.
 Save to Pinterest
 There was a day we made these on a whim, just for fun, and ended up sitting in pajamas at the kitchen table, giggling with sticky fingers. The rainbow Jello cups weren’t just dessert; they became a reason to slow down and enjoy making memories, even if the only audience was ourselves. It’s funny how food sometimes creates its own little celebration. I still remember the light reflecting on the colored layers as laughter echoed through the kitchen. It’s a small joy that sticks with you.
Behind the Bright Layers
Every new batch feels a bit like painting, only you’re tasting the masterpiece at the end. I learned that clear cups make a difference—the rainbow really shines and everyone gets excited before the first bite. There’s a rhythm in preparing this recipe; by the third layer, you’ll be moving with confidence. Kids love taking turns pouring each color, and adults usually want to join in. A rainbow on the counter means you’re doing something right.
Jello Setting Secrets
The biggest trick is patience—don’t try shortcuts, because a little extra time gives those crisp, gorgeous stripes. If stubborn layers don’t set, an extra ten minutes in the fridge usually does the job. Sometimes a layer falls or leans, but nobody truly cares when whipped cream comes out. Use a timer and the chill time turns into a series of little kitchen breaks. It’s a low-stress dessert with a lot of visual payoff.
Simple Swaps & Party Tips
Experimenting with flavors is part of the fun—swap in cherry, pineapple, or whatever suits the day. Sugar-free and dairy-free options mean you can please more guests, and the process always turns into a creative collaboration. This dish isn’t just about following steps—it’s about making the kitchen a playground, with a rainbow to show for it.
- Keep whipped cream cold for smoother topping.
- Sprinkles go on just before serving to avoid color bleed.
- Let everyone pick their favorite layer order for individual cups.
 Save to Pinterest
 One thing’s for sure: Rainbow Jello Cups bring a smile to any table and give you a perfect excuse to play with your food. Enjoy every colorful spoonful with those you love.
Recipe FAQs
- → How do I prevent the Jello layers from mixing?
Allow each layer to fully chill and set before adding the next color, usually 30–40 minutes per layer.
- → Can I use sugar-free Jello for this dessert?
Yes, sugar-free versions work well and provide a lighter option for the layered cups.
- → What alternatives are there for whipped cream?
Coconut whipped cream or non-dairy toppings are great choices for those avoiding dairy.
- → How far in advance can I prepare these cups?
You can make them a day ahead. Keep refrigerated and add toppings just before serving.
- → Can I customize the Jello colors?
Absolutely! Select any combination of colors or flavors to suit the occasion or your preferences.
- → Are these suitable for vegetarians?
Yes, as long as the Jello and toppings are vegetarian. Always check ingredient labels.