 Save to Pinterest
 My friend Sarah brought a jar of homemade black currant gummies to book club one evening, and I immediately understood why she'd been raving about them for weeks. That first taste—the burst of tart berry flavor followed by the gentle chew—felt like a small luxury, the kind of thing you'd expect to find in a fancy candy shop, not someone's kitchen. I asked for the recipe that night, and what struck me most was how simple it actually was. Within a few weeks, I'd made my first batch, and now whenever friends visit, they leave with a small container tucked under their arm.
I tested this recipe one winter morning when my nephew was visiting, and he watched the whole process from stool-height at the counter, narrating like a sports commentator. When the gummies came out of the molds perfectly, shiny and jiggly, he declared it "kitchen magic." He ate exactly four before his mom cut him off, and I've been chasing that same moment of pure joy ever since—that instant when someone tastes something you made and their eyes light up.
Ingredients
- Fresh or frozen black currants (1 cup / 150 g): The heart of everything—frozen ones work beautifully and are often easier to find than fresh, plus they've already been picked at peak ripeness.
- Water (1/3 cup / 80 ml): Just enough to coax the berries into releasing their deep, dark juices without drowning them.
- Lemon juice (2 tablespoons): This is the secret weapon that makes the tartness sing; it cuts through the sweetness and makes each gummy taste more alive.
- Granulated sugar (3/4 cup / 150 g): Use regular white sugar here—it dissolves cleanly and lets the berry flavor take center stage.
- Unflavored powdered gelatin (3 tablespoons / 30 g): The texture maker; this is what transforms liquid into those perfectly chewy gummies you're after.
- Cold water for blooming (1/3 cup / 80 ml): Cold is crucial—warm water would activate the gelatin too early and you'd lose the magic.
- Granulated sugar for coating (1/4 cup / 30 g, optional): A sparkly finish that adds a little crunch and makes them feel extra special.
Tired of Takeout? 🥡
Get 10 meals you can make faster than delivery arrives. Seriously.
One email. No spam. Unsubscribe anytime.
Instructions
- Simmer the black currants into softness:
- Place your currants and water in a saucepan and let them bubble gently over medium heat for about 5 to 7 minutes. You'll notice the berries beginning to collapse and release their deep purple juice—trust that this is exactly what should be happening.
- Strain without waste:
- Pour everything through a fine mesh strainer set over a bowl, pressing gently with the back of a spoon to coax out all the liquid and pulp while leaving the skins and seeds behind. You should end up with roughly 2/3 cup of beautiful dark puree.
- Sweeten and brighten:
- Stir the lemon juice and sugar into your warm puree, making sure the granules dissolve completely. The mixture will smell incredible at this point—take a second to appreciate it.
- Bloom the gelatin:
- Sprinkle your gelatin powder over the cold water in a small bowl and let it sit untouched for 5 minutes. This blooming step ensures silky, lump-free gummies; skip it and you'll regret it.
- Combine gelatin and puree gently:
- Return the black currant mixture to low heat and add your bloomed gelatin, stirring constantly until it's completely dissolved. Keep the heat low—you're looking for the mixture to be warm enough to blend smoothly, not hot enough to bubble aggressively.
- Pour into molds with intention:
- Transfer the mixture carefully into silicone molds or a parchment-lined 8x8-inch pan, then tap the molds gently against your counter a few times to release any hidden air bubbles that would create little voids in your finished gummies.
- Chill until set:
- Refrigerate for at least 2 hours—I usually leave mine overnight because I find they're firmer and more satisfying the next day. Your patience will be rewarded.
- Unmold and finish:
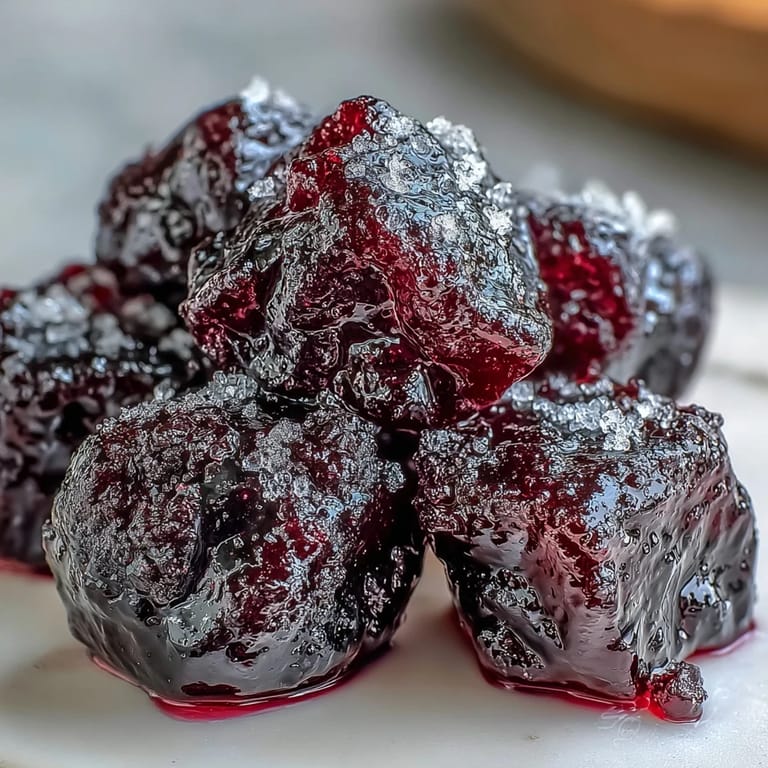
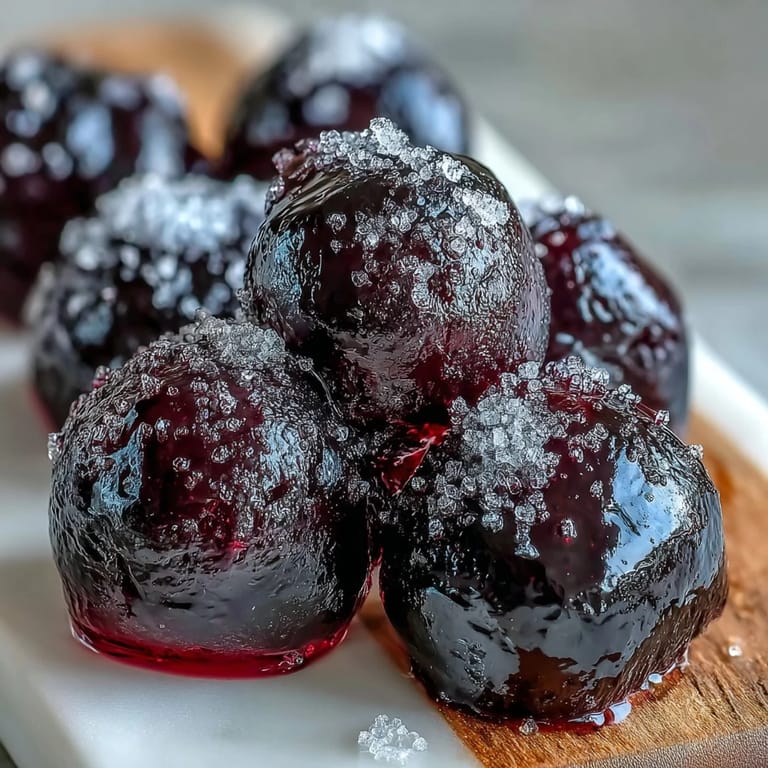
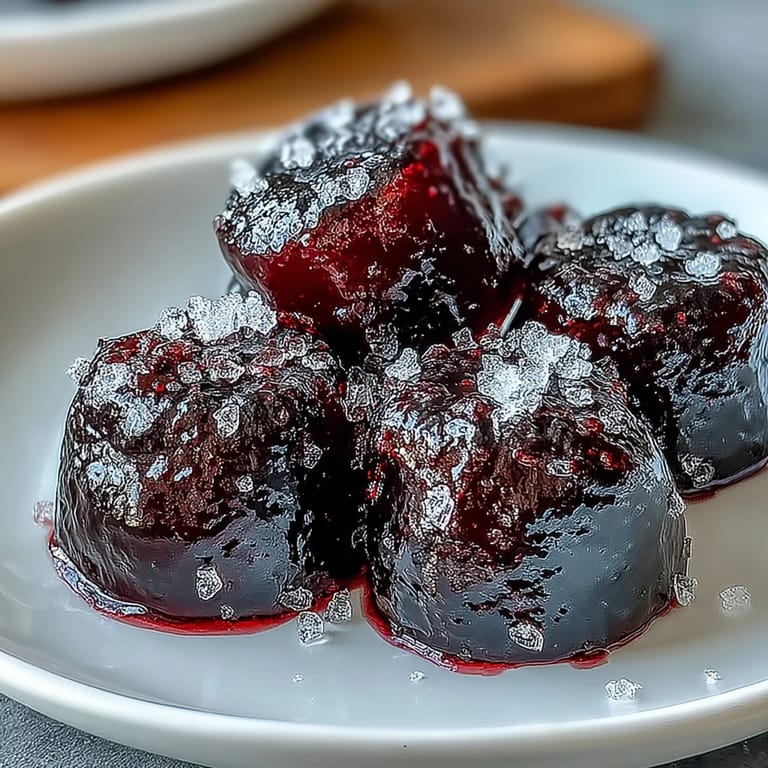
- Pop your gummies from the molds or cut them into rough squares if using a pan. If you're coating them in sugar, toss them now while they're still slightly tacky.
 Save to Pinterest
 There's something deeply satisfying about offering someone a homemade candy that tastes like it came from a proper confectioner, knowing it cost you almost nothing in terms of effort. I made these for my daughter's teachers last year, packed in little cellophane bags tied with twine, and one teacher emailed to say they were gone within an hour of being shared in the staff room. Small moments like that remind me why I love making food for others.
Why Black Currants Are Worth Hunting For
Black currants have this incredible tangy depth that regular berries just don't match—it's almost wine-like, with a slight earthiness beneath the sweetness. If you can't find them fresh, frozen are genuinely just as good and often cheaper, since they're picked and frozen at peak ripeness. The tartness is the whole point; it's what makes these gummies feel sophisticated rather than cloying like some store-bought candies.
The Magic of Temperature Control
Every time I make these, I'm reminded that candy-making is as much about respecting heat as it is about following measurements. Low, gentle heat when you're dissolving the gelatin prevents it from breaking down and losing its gelling power—you're not trying to cook anything at this stage, just gently marry two mixtures together. Once I started treating this step with proper care instead of rushing it, my gummies transformed from questionably textured to genuinely perfect.
Storage and Serving Secrets
These gummies need to live in the refrigerator, which is actually a blessing because they stay fresher longer and have a more satisfying chew when they're cold. They'll keep for about a week in an airtight container, though they rarely last that long in my house. Store them in a single layer at first (separated by parchment if you're stacking), so they don't stick to each other or get squished.
- Gummies left uncovered in the fridge overnight become firmer and lose some moisture, which some people prefer for a more adult texture.
- If you're feeling fancy, dust them lightly with a mixture of sugar and a tiny pinch of tart citric acid for extra zing.
- They make wonderful gifts—a homemade candy that feels luxurious without tasting overly sweet or artificial.
 Save to Pinterest
 Making black currant gummies has become one of those small kitchen rituals I look forward to, the kind of thing that costs very little but feels like a genuine accomplishment. There's real joy in pulling a jar of homemade candy from your fridge knowing exactly what's inside it.
Recipe FAQs
- → How long do homemade gummies last?
Stored in an airtight container in the refrigerator, these gummies stay fresh for up to 2 weeks. They may become slightly firmer over time but remain perfectly enjoyable.
- → Can I make these without gelatin?
Yes, substitute unflavored gelatin with agar-agar powder. Use approximately 1.5 tablespoons and adjust preparation methods as agar sets differently than gelatin.
- → What other fruits work well for gummies?
Raspberries, blueberries, strawberries, or blackberries all make excellent alternatives. Each brings its own unique flavor profile and natural sweetness to the final candy.
- → Why is my mixture not setting properly?
Ensure gelatin is fully bloomed in cold water before adding to the warm fruit mixture. Avoid boiling the gelatin, as excessive heat can break down its setting properties.
- → Do I need candy molds?
Not necessarily. Silicone molds create uniform shapes, but a parchment-lined baking pan works perfectly. Simply cut the set mixture into squares or rectangles for a rustic look.
- → Can I reduce the sugar?
You can slightly reduce sugar, but keep in mind it helps preserve texture and shelf life. Less sugar may result in softer, shorter-lasting gummies.